Voice Over Video: Master Recording, Editing, and Syncing for Engaging Content
Learn to record, edit, and sync a professional voice over video with scripting, gear tips, and techniques to captivate your audience.
A good voice over video does more than just add narration—it forges a real connection with your audience. A compelling human voice can guide viewers, build trust, and make your message stick long after the video is over. It’s what turns a simple visual into a memorable story.
Why a Great Voice Over Is Non-Negotiable
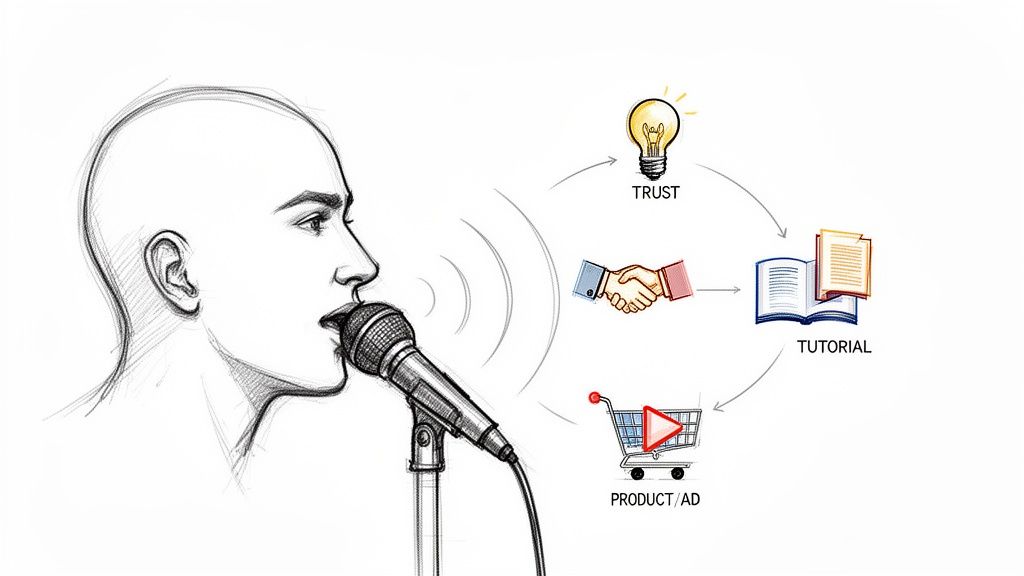
Think about the last tutorial you watched that actually helped you, or a product ad that genuinely caught your interest. What made it work? The visuals probably drew you in, but it was the voice that held your attention, explained the tricky parts, and ultimately convinced you.
On the flip side, a flat, robotic, or poorly recorded narration is an instant turn-off. It doesn't matter how polished your visuals are; bad audio will make people click away in seconds.
A warm, confident, and clear voice over, however, can completely change the game. It establishes authority, making your content feel more credible and professional. For how-to videos, it transforms complicated steps into a simple, follow-along guide. In marketing, a good voice injects emotion and personality, making a brand or product feel much more relatable.
The Heartbeat of Your Message
Your voice over isn't just an afterthought; it's the central pillar holding up your entire video. It’s the narrative engine. That’s why the global dubbing and voice-over market is expected to balloon from USD 4.2 billion to USD 8.6 billion within the next decade.
Human-led voice services are still king because people connect with authentic, relatable performances that AI just can’t quite mimic yet. If you dig into the voice over market trends, you’ll see that entertainment and media alone ate up 32.5% of this market. People crave that human touch.
This guide will walk you through the entire process, from scripting and recording all the way to the final sync. We’ll also look at how some new tools are making professional quality more achievable for everyone.
For instance, a tool like VideoBGRemover lets you overlay clean, background-free footage of yourself onto a presentation. When you pair that with a polished voice over, you create a direct, personal connection—it feels like you're right there in the room with your audience.
This approach makes your voice the primary tool for engagement, turning people who are just passively watching into genuinely active listeners.
Setting Up for a Flawless Voice Recording
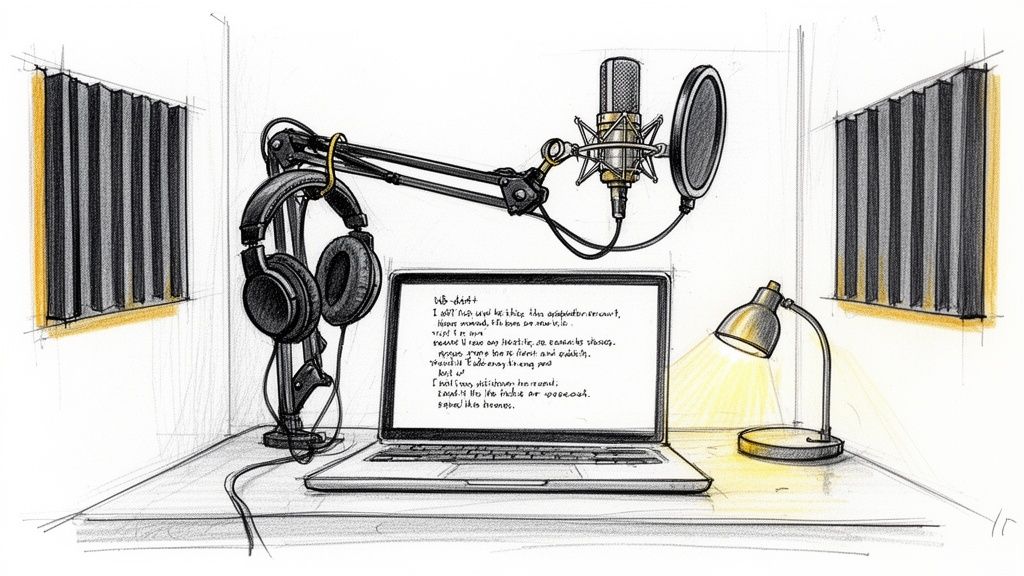
Great audio doesn't just happen. It’s the direct result of smart preparation, and frankly, it's what separates amateur content from the professional stuff. Before you even think about hitting that record button, getting your script, space, and gear sorted will make all the difference in your final voice over video.
It All Starts With The Script
We've all heard it: a voiceover that sounds like someone is just reading. It's stiff, robotic, and completely unnatural. This usually happens when the script is written for the eyes, not the ears.
The secret? Write like you talk.
Use contractions ("it's" instead of "it is"). Keep sentences direct and clear. The best trick I've learned is to read every single line out loud as I'm writing it. If a sentence feels clunky or awkward to say, it’s going to sound ten times worse in the final recording. Trust me, rewrite it.
This practice run also helps you nail the pacing. Mark up your script with notes for pauses and breaths. Those little gaps are what make a delivery feel human and give your audience a moment to let key points sink in.
Taming Your Recording Environment
Your room is an instrument, and if you don't tame it, it'll ruin your sound. Hard, flat surfaces—bare walls, big windows, wood floors—are your enemy. They act like mirrors for sound, bouncing your voice all over the place and creating nasty echo and reverb.
You don't need a pro-level booth to get clean audio. The goal is to absorb sound, not reflect it.
A walk-in closet is the classic home studio hack for a reason; all that hanging clothing acts as a natural sound dampener. If you don't have one, you can easily create a similar effect:
- Hang a few heavy blankets or even thick towels on the walls around you.
- Toss some pillows or cushions into the corners of the room.
- For a quick and dirty solution, record under a thick comforter. It looks silly, but it works wonders.
The goal isn't total silence; it's acoustic treatment. You're simply trying to stop your voice from reflecting off surfaces and bouncing back into the mic. It’s the difference between sounding like you’re in a cavernous bathroom versus a cozy, intimate space.
Of course, if you need absolutely pristine quality without the hassle, you can always look into professional recording studios. They offer perfectly controlled environments and high-end gear, guaranteeing a flawless take every time.
Choosing The Right Gear For Your Voice
Finally, let's talk gear. The market is flooded with options, but you really only need a few key pieces to get started. A quality microphone is, of course, ground zero.
For most creators, a USB condenser microphone hits the sweet spot between quality and convenience. They plug right into your computer and deliver crisp, clear audio that’s perfect for voice work. Models like the Blue Yeti or Rode NT-USB are popular for good reason—they're reliable and sound great.
While you could go down the rabbit hole of XLR mics and audio interfaces, a solid USB mic is more than enough for most projects.
What's often overlooked, though, are the accessories. A pop filter is non-negotiable. This simple screen clips onto your mic and softens those harsh "p" and "b" sounds (called plosives) that create an awful popping noise. It's a cheap piece of gear that makes a huge difference.
Lastly, grab a pair of closed-back headphones. Monitoring your audio as you record is crucial for catching problems like background noise or clipping in real time, saving you a massive headache in post-production.
Essential Voice Over Gear for Every Budget
Navigating the world of audio equipment can be overwhelming. To make it easier, here’s a quick breakdown of solid gear choices, whether you're just starting out or ready to upgrade your setup.
| Gear Type | Beginner (Under $100) | Intermediate ($100-$300) | Professional ($300+) |
|---|---|---|---|
| Microphone | Audio-Technica AT2020 USB+ | Blue Yeti / Rode NT-USB | Shure SM7B / Rode Procaster |
| Headphones | Audio-Technica ATH-M20x | Sony MDR-7506 | Beyerdynamic DT 770 PRO |
| Accessories | Basic Pop Filter & Desk Stand | Pop Filter & Boom Arm | Shock Mount, Pop Filter & Studio Boom Arm |
Remember, the "best" gear is what works for your voice, your space, and your budget. You can capture incredible audio with a simple setup as long as you pay attention to the fundamentals.
How to Record and Edit Your Audio Like a Pro
Now that you have your script and a quiet recording space, it's time for the fun part: capturing and polishing your audio. This is where we take your raw performance and turn it into a professional, crystal-clear track ready for your voice over video.
I'll be using Audacity, a fantastic and free audio editor, for my examples, but the core ideas here apply to pretty much any editing software you might be using.
The first, and arguably most important, thing to get right is your recording level. Get this wrong, and you’re creating a ton of extra work for yourself later. If you record too quietly, you’ll have to crank up the volume in post-production, which also brings up all the unwanted background hiss. Record too loud, and the audio will "clip"—that nasty, distorted, crackling sound that’s impossible to fix.
So, what's the sweet spot? Aim for your voice to peak somewhere between -12dB and -6dB on your software's input meter. This gives you a strong, clean signal with plenty of headroom, ensuring you capture every bit of your performance without any distortion.
Your Essential Editing Workflow
Once you’ve got a clean take, the editing magic begins. Don't worry, you don't need to be a seasoned audio engineer. A few key techniques will handle about 90% of what's needed to make your audio sound amazing. These are simple, high-impact adjustments, not complicated studio wizardry.
First up, let's get rid of any background noise. Even in a well-treated room, your microphone is a sensitive piece of equipment; it will pick up the low hum of your computer fan or the whisper of an air conditioner. Audacity’s "Noise Reduction" effect is a lifesaver for this. Just highlight a few seconds of pure room tone (the silence between your sentences), tell Audacity to learn that sound profile, and then apply the effect to your entire track. It’s that simple.
Next, you’ll want to balance everything out with compression. Think of a compressor as an automatic volume knob. It intelligently turns down the loudest parts of your speech and boosts the quietest parts. The result? A much more consistent and even sound that’s easier for your audience to listen to, making your voice sound more present and professional.
For a deeper dive, check out our guide on how to remove background noise from video, which has some extra tricks you can apply here.
This is what you'll see inside Audacity. The waveform gives you a visual map of your audio, making it easy to spot those loud peaks or quiet sections that need a little love. You can find effects like Noise Reduction or Compression right in the "Effect" menu.
Adding That Final Polish with EQ
The final touch is a bit of gentle Equalization, or EQ. An EQ lets you fine-tune specific frequencies in your audio, much like adjusting the bass and treble on your stereo. It’s all about enhancing the natural tonal quality of your voice.
For most voices, a couple of small tweaks do wonders. You can add a little warmth and body by slightly boosting the lower frequencies (around 80-120 Hz). To add clarity and a bit of "air," a gentle boost to the higher frequencies (around 5-10 kHz) works great. I also like to use a "high-pass filter" to cut out any inaudible low-end rumble below 80 Hz, which cleans things up nicely.
The key takeaway with editing is that less is more. The goal is to enhance your natural voice, not transform it into something artificial. Each step—noise reduction, compression, and EQ—should be applied subtly to create a clean, balanced, and professional final product.
The voice-over world has changed dramatically, with the majority of talent now working from home studios. This has really opened up the field, making it possible for anyone with the right techniques to produce top-tier audio. By mastering these fundamental recording and editing steps, you’re essentially building your own professional-grade production process right at your desk. You can discover more insights about how the voice-over industry has changed on cmdnyc.com.
Syncing Your Voice Over for a Seamless Experience
Alright, you’ve got your polished audio track and your video clips are ready to go. Now comes the fun part: bringing them together. This is where the real magic happens, turning two separate assets into a single, professional voice over video. This isn't just about dropping an audio file onto your timeline—it’s about timing, feel, and telling a story where the sound and visuals work in perfect harmony.
The most straightforward way to start is by laying down your voiceover track first. Think of it as the narrative backbone of your video. Once it's in place, you can begin cutting your video clips to match the key phrases and beats of your narration. If you say, "Next, click the 'Export' button," that's your cue. The shot of the cursor clicking that button should appear right on that word. This kind of tight sync makes your instructions feel incredibly clear and satisfying to watch.
Elevating Transitions with J-Cuts and L-Cuts
To make your video feel less like a slideshow and more like a professionally edited piece, you'll want to get familiar with J-cuts and L-cuts. These are old-school editing tricks that create a much more natural, cinematic flow between your shots. They get their names from the shape they make on the editing timeline.
- J-Cut: This is when the audio from the next clip starts a moment before you see the video for it. For example, you might hear a person start to speak, and then the camera cuts to them. It’s a great way to build a little anticipation and pull the viewer smoothly into the next scene.
- L-Cut: Here, the audio from the previous scene carries over into the next scene. Imagine your voiceover is finishing a thought about a product's benefit while the video has already cut to a shot of a happy customer using it. This technique creates a beautiful, logical link between two different visuals.
Using J-cuts and L-cuts makes your editing feel intentional and smooth, avoiding the jarring effect you get when audio and video always switch at the exact same time. It’s a subtle touch, but it makes a huge difference in how professional your final video feels.
Pacing and the Power of a Good Pause
The rhythm of your video is absolutely critical. If your voiceover is constantly rushing ahead of the visuals, your audience will feel lost. If it lags behind, the whole thing will feel clunky and disconnected. I always recommend watching your synced timeline multiple times. Listen closely. Does the narration feel aligned with the on-screen action? You might need to trim a fraction of a second of dead air here or stretch a clip by a few frames there to get the timing just right.
And while we're on the topic of timing, let's talk about silence. Don't be afraid of it. A well-placed pause can be more powerful than any word you say.
Strategic silence gives your audience a moment to absorb a key point, builds tension before a big reveal, or just offers a much-needed breath during a dense explanation. It's one of the most effective tools for adding emphasis.
Mixing Your Audio for Total Clarity
Finally, let's touch on the audio mix. If you're adding background music or sound effects, your voiceover needs to remain the undisputed star of the show. One of the most common amateur mistakes is letting the background music drown out the narration. If your viewers have to strain to hear what you're saying, you've already lost them.
A good rule of thumb is to make your voiceover the loudest element in the mix, no question. Background music should be turned way down, often 15-20 dB quieter than your voice track. This way, it adds atmosphere and emotion without ever competing for the spotlight. Mastering these core techniques is essential for creating great content, and if you want to dig deeper, you can explore some other video editing best practices to take your skills even further.
Combining Your Voiceover with a Transparent Video
Alright, let's get into a technique that can seriously level up your videos. We're moving beyond basic picture-in-picture and into a much sleeker, more professional look: combining your crisp voiceover with background-free video.
This is the secret sauce for creating those super engaging tutorials or product demos where the presenter is right there on screen, interacting with the content. It’s a game-changer.
The magic starts with creating a video that has a transparent background. In the past, this meant messing around with green screens, lighting, and a whole lot of post-production headaches. Now, tools like VideoBGRemover handle the heavy lifting. You just feed it your clip, and its AI neatly cuts you (or your product) out from the background. It's an incredible shortcut to a professional result.
This diagram breaks down the basic idea of how your separate video and audio tracks come together to create that final, perfectly synced product.
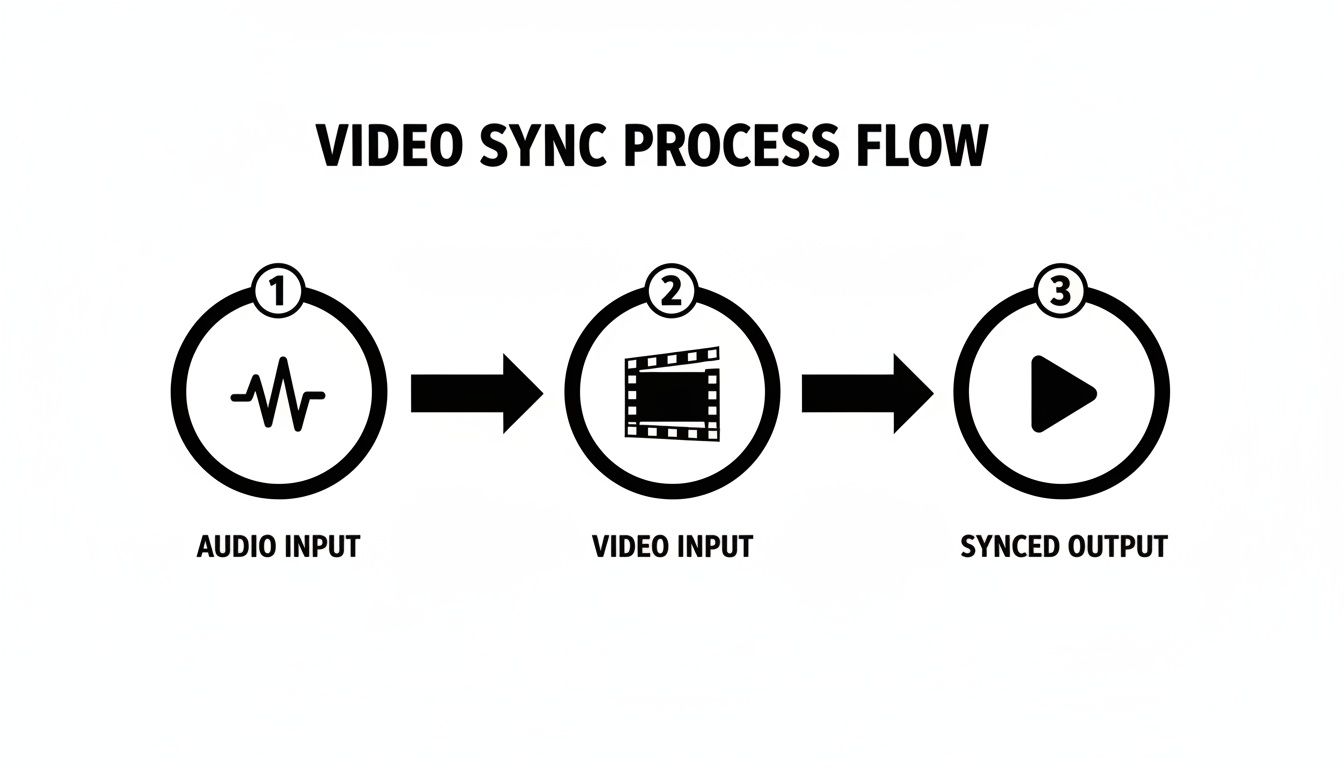
Think of it as two separate streams—your visuals and your narration—that we're about to merge into one polished asset.
Creating Overlays with Your Transparent Export
Once you have that transparent video file (usually a MOV ProRes 4444 or something similar), you can start having some real fun in your video editor. This isn't just a video file anymore; it's a flexible visual element you can layer on top of anything.
A classic example is placing a video of yourself in the corner of a software screencast. Instead of just being a disembodied voice, you're there, guiding the viewer through the steps. This builds a much stronger connection and makes the whole thing feel more personal and authoritative.
This isn't just for tutorials, either. It’s a powerful marketing tool. The voiceover industry is booming for a reason: a strong narrative is crucial, especially when you consider that video content generates 12 times more shares than text and images put together. A professional voiceover paired with a clean visual overlay makes your message stick.
Pro Tip: When you place your transparent video layer into your project, add a very subtle drop shadow. It’s a tiny detail, but it makes a world of difference. It adds a bit of depth that helps "sell" the effect, making you look like you're actually in the scene instead of just being a flat cutout slapped on top.
With the background gone, your subject is perfectly isolated and ready to be dropped into a new environment, giving you complete creative control. For a more detailed breakdown of the technical side, we have a whole guide on how to create a transparent video background.
Common Voice Over Questions Answered
Even with the best workflow, you're bound to hit a few snags when recording voice overs. I've been there. Let's walk through some of the most common questions and sticking points that come up, so you can skip the frustration and get right to a polished final product.
How Do I Get Rid of Those Annoying Mouth Clicks and Pops?
This is probably the number one issue people face. Your high-quality mic is great at picking up your voice, but it's also incredible at picking up every tiny click and pop from your mouth. The fix is surprisingly low-tech.
First, hydrate, hydrate, hydrate. Room-temperature water is your best friend before and during a session. Another old-school radio trick? Eat a green apple beforehand. The tartness and pectin actually help clear out some of that sticky saliva that causes the noises.
What’s the Best Audio Format to Use?
When you’re exporting that initial voice recording from your audio software, always, always save it as a WAV file. Think of it as the raw, uncompressed version of your audio—it contains all the data, giving you the most quality and flexibility during the editing phase.
You’ll export the final video as a compressed MP4, but for the work-in-progress audio, WAV is the professional standard for a reason.
Should I Get a USB or XLR Microphone?
This question trips up a lot of people starting out. For most creators, a high-quality USB microphone is fantastic. You plug it straight into your computer, and you’re ready to go. The quality is more than enough for professional-sounding voice overs.
An XLR microphone setup is the next step up. It requires an audio interface to connect to your computer, but it gives you more control and can offer slightly higher fidelity. It's a great choice if you're serious about building out a more advanced home studio, but it’s not essential to get started.
The key isn't just the microphone, but how you use it. Consistent mic placement, about 6-8 inches from your mouth and slightly off-axis, will do more for your sound quality than simply buying a more expensive piece of gear.
What About Using an AI Voice?
Beyond human narration, some creators consider modern alternatives. The technology has gotten impressively good, making it a genuinely viable option for certain projects, like instructional videos or quick social media clips.
If you're curious about this route, you can Explore options for AI-generated voices to see if they fit your brand and content style. Ultimately, it comes down to the kind of connection you want to build with your audience—sometimes, nothing beats a real human voice.
How Should I Handle Mistakes While Recording?
Resist the urge to stop and restart every time you stumble over a word! This kills your momentum. Instead, just pause for a second, give a loud, sharp clap with your hands, and then deliver the line again.
That clap will create a massive, obvious spike in your audio waveform, making it incredibly easy to find and delete the bad take during editing. It’s a simple trick that will save you a ton of time and keep you in the creative zone.
Ready to create stunning overlays with your polished voice over? VideoBGRemover makes it easy to remove your video's background and export a transparent file, perfect for professional tutorials and engaging product demos. Get started for free at videobgremover.com.
Ready to Remove Your Video Background?
See a free preview before you buy.
No credit card required • Free preview on every video