Mastering Background Green Screen Video Production
A practical guide to creating flawless background green screen video. Learn proven techniques for lighting, shooting, and chroma keying like a pro.
Using a background green screen video is your ticket to swapping out a real-world setting for literally any digital environment you can dream up. The concept is simple: you film your subject in front of a solid green color, and then, with a little software magic, you replace that green with a new image or video.
Why Mastering Green Screen Unlocks Creative Freedom
The power to completely control your video's environment is a total game-changer for creators. Instead of being stuck dealing with physical locations, tight budgets, or even bad weather, you can instantly transport your audience anywhere in the world—or out of it. This kicks the door wide open for incredible storytelling, sharp branding, and truly engaging your viewers.
The trick behind this technique is called chroma keying. It’s a process where software isolates a very specific color (the "chroma")—in our case, green—and makes it transparent. This lets you punch a hole in the video and slip another image or video layer right behind your subject.
The Power of a Virtual Set
So, why green? It all comes down to color science. That bright, almost fluorescent shade of green is about as far away from natural human skin tones and hair colors as you can get. This contrast makes it incredibly easy for software to tell the difference between your subject and the background, resulting in a clean, sharp cutout.
While blue screens were the go-to in the film industry as far back as the 1940s, green eventually became the standard for digital video. This shift happened because modern digital cameras are more sensitive to green light, capturing more detail and producing a cleaner key with less noise.
This seemingly simple technique delivers some massive advantages for any video project:
- It’s Budget-Friendly: Forget about shelling out cash for expensive location shoots or building complex physical sets.
- You Have Total Creative Control: Place your subject in a fantasy world, a sleek corporate office, or a custom-branded environment.
- It Creates Consistency: Nail down a consistent look and feel across all your videos, no matter when or where you film them.
To get that perfect result, you have to nail the fundamentals during your shoot. Getting these core elements right from the start saves you hours of headaches in post-production.
Core Elements for a Flawless Green Screen Shoot
| Element | Objective | Common Mistake to Avoid |
|---|---|---|
| Even Lighting | Illuminate the green screen uniformly to create a solid, consistent color. | Creating "hot spots" or shadows on the screen, which makes keying difficult. |
| Subject Separation | Keep your subject several feet away from the screen. | Standing too close, which causes green light to spill onto the subject. |
| Clean Wardrobe | Avoid wearing green or reflective clothing, jewelry, or accessories. | Wearing a green tie or shiny glasses that will become transparent during the key. |
| Stable Camera | Use a tripod and a higher shutter speed to minimize motion blur. | Hand-holding the camera, which creates blurry edges that are hard to key cleanly. |
By focusing on these four areas, you’re setting yourself up for a much cleaner, more believable final product.
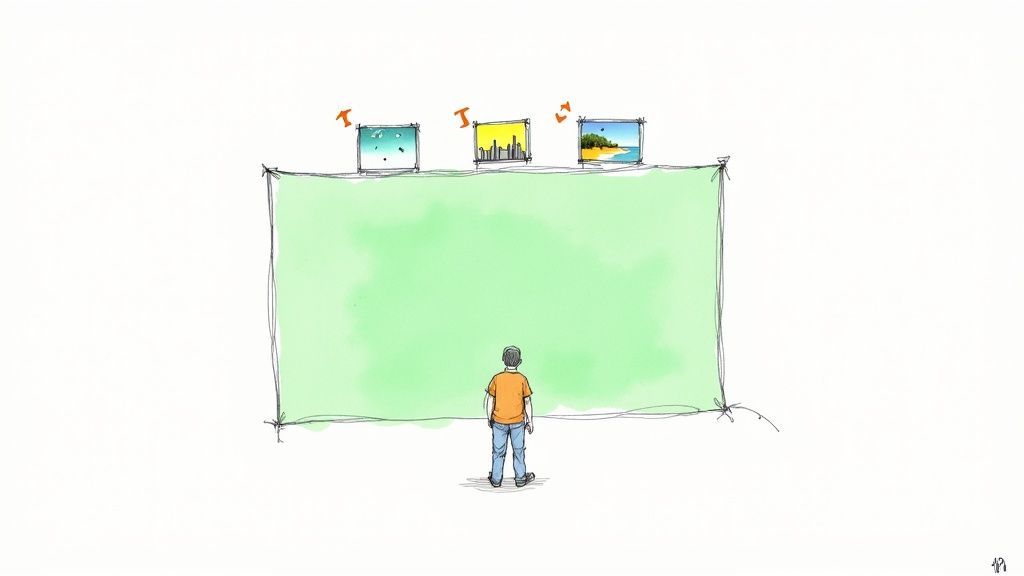
The real power of a green screen isn't just about swapping backgrounds; it's about giving you, the creator, ultimate control over your visual story. From a spare bedroom, you can produce content that looks like it came from a million-dollar studio.
This creative freedom is especially valuable when you're producing things like high-converting video sales letters, where a polished, professional background can make or break viewer trust. By mastering this simple yet powerful tool, you can seriously elevate your production value without emptying your wallet.
Setting Up Your Green Screen Studio
You've probably heard the old saying that success is 90% preparation and 10% perspiration. Well, when it comes to getting a professional background green screen video, it's more like 90% preparation and 10% post-production magic. A clean, seamless key starts long before you ever open your editing software—it all hinges on how you set up your space. Getting this right will save you a world of headaches later on.
The first choice you'll face is the screen itself. What you pick here really depends on your space, budget, and how permanent you want your setup to be.
- Fabric Screens: These are the go-to for many creators because they're portable and don't break the bank. Most are made of muslin or polyester, but their biggest enemy is wrinkles. Wrinkles create shadows, and shadows are the death of a clean key. Always have a steamer or iron handy before you start rolling.
- Paper Rolls: If you’ve ever been in a photo studio, you’ve seen these. Big rolls of paper provide a perfectly smooth, non-reflective surface. The downside? They’re delicate. They tear easily and aren’t great if your talent needs to stand on the background.
- Paint: For anyone building a dedicated studio, chroma key paint is the undisputed champion. You get a flawless, uniform surface with zero chance of wrinkles. It's obviously not a portable solution, but for consistent, high-quality work in one spot, it can't be beaten.
Getting the Lighting Just Right
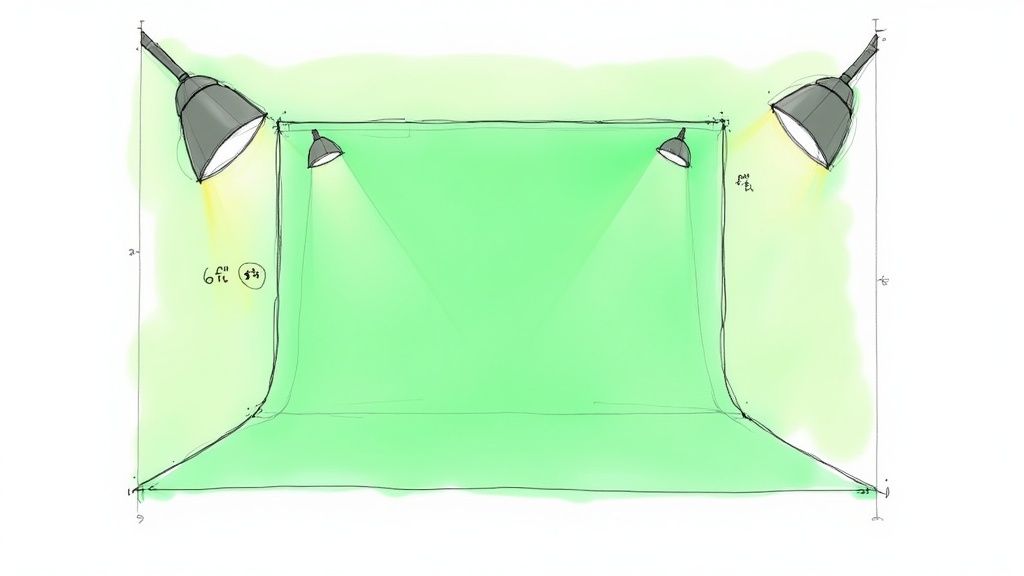
I can't stress this enough: lighting is the most important part of a green screen shoot. Your goal is simple: even illumination from corner to corner. No shadows, no bright "hot spots." If your lighting is uneven, your software has to guess where your subject ends and the background begins, which leads to a flickering, amateur-looking result.
The trick is to light your screen and your subject completely separately. A classic, battle-tested setup is to place two softbox lights at a 45-degree angle on either side of the screen. This creates a soft, diffused wash of light that kills shadows and gives your keyer a flat, consistent color to work with.
For a truly professional key, the light hitting your green screen shouldn't vary by more than +/-10% across the entire surface. This level of consistency is what allows the software to pull a clean, precise key without artifacts.
Positioning Your Talent and Picking the Right Wardrobe
With the screen perfectly lit, it's time to bring in your subject. Make sure to place them at least six to ten feet away from the green screen. This distance is non-negotiable for two big reasons. First, it prevents them from casting a shadow on your beautiful, evenly-lit backdrop.
Second, and more critically, it minimizes color spill. Spill is that nasty green halo you sometimes see on a subject's hair or shoulders. It happens when green light from the screen literally bounces off it and onto your talent. The further away they are, the less spill you'll have to fight in post-production. You can find more practical setup advice in our complete guide on how to use a green screen.
As a side note, you might wonder why green is the standard. While blue screens were common in the film days, modern digital camera sensors are far more sensitive to the green channel. This gives you a cleaner signal with less noise, making it easier to pull a perfect key, especially as you move into 4K where every little imperfection is magnified. If you're a history buff, Lensrentals.com has a great article on the technical history of chroma keying.
Finally, let's talk wardrobe. This one is simple but can absolutely ruin a shoot if you forget. Your talent cannot wear anything green—unless you want them to be invisible. It’s also wise to avoid highly reflective items like shiny jewelry, glasses with a lot of glare, or glossy fabrics. These surfaces can act like tiny mirrors, picking up green reflections from the screen and creating weird, distracting artifacts in your final video.
Nailing Your Camera Settings for a Flawless Key
You’ve got your green screen lit like a pro and your talent is in position. Now, it's all down to the camera. The settings you dial in at this stage are absolutely crucial—get them right, and the keying process will feel like magic. Get them wrong, and you're in for a world of pain and tedious cleanup in post.
Think of your camera sensor as the very first step in the entire chroma key workflow. Your job is to feed it as much clean, high-quality color information as you possibly can. This is where your camera's codec and color sampling become non-negotiable. Always, and I mean always, shoot in the highest quality format your camera can handle. You're looking for a color sampling of at least 4:2:2.
So what does that mean in the real world? A 4:2:2 signal records double the color detail of the 4:2:0 signal found in most consumer cameras. That extra data is gold for your editing software, giving it way more information to distinguish the precise edge of your subject from the green behind them. This one setting is often the difference between a crisp, professional key and a fuzzy, amateurish one.
Getting the Exposure Just Right
With your codec locked in, your next mission is to obliterate motion blur. Motion blur is the sworn enemy of a clean key. It creates soft, semi-transparent edges that are a nightmare to separate from the background.
To fight it, you need to crank up your shutter speed. The classic rule of thumb is to set your shutter speed to at least double your frame rate. It's a simple trick that works every time.
- Shooting at 24 fps? Your shutter should be at least 1/50s.
- Filming at 30 fps? Go for 1/60s or faster.
- Need 60 fps for some smooth slow-mo? You'll want a shutter of 1/125s.
This ensures every single frame is sharp, giving your keyer a clean, well-defined line to follow. It's a small tweak that has a massive impact on any background green screen video.
Next up is digital noise. Keep your ISO as low as you can possibly get it, sticking to your camera’s native setting if you know it (usually around ISO 100-400). Pushing the ISO too high introduces a grainy texture that confuses the keying software and can create a nasty "crawling" effect in your final matte. If the scene is too dark, add more light. Don't fall into the trap of cranking the ISO.
The name of the game is capturing the cleanest possible image in-camera. Every little imperfection you introduce on set—from motion blur to digital noise—will be amplified tenfold once you start keying.
Keeping Everything in Sharp Focus
Last but not least, let's talk about your aperture, which controls your depth of field. That beautiful, blurry background you love for cinematic shots (think f/1.8) is a disaster for green screen. If your green screen itself is out of focus, the keyer will struggle to find a consistent, solid color to remove.
For green screen work, you need a deeper depth of field. This keeps both your subject and the screen behind them nice and sharp. I usually start at an aperture of f/4 and often push it to f/5.6 or even f/8 if I have enough light. This gives the software a perfectly uniform green color to work with, making the key clean and believable. And of course, lock that camera down on a sturdy tripod—any shakiness will just reintroduce the motion blur you worked so hard to get rid of.
The Art of a Seamless Chroma Key
You’ve nailed the shoot, and now it’s time to head into the edit. This is where the real magic happens, turning that green-screen footage into a believable composite. The process is called chroma keying, which is basically just telling your software to make every pixel of that specific green color completely transparent.
The good news? Most modern video editing software—think Adobe Premiere Pro, Final Cut Pro, and DaVinci Resolve—has incredible keying tools built right in. While the effect might be called "Ultra Key" in one and "Chroma Keyer" in another, the fundamental workflow is almost identical.
The first step is always the most satisfying. You apply the keying effect, grab the eyedropper tool, and click on the green background. Just like that, it vanishes, leaving your subject floating in a sea of black. That black area is now pure transparency, ready for you to drop your new background layer underneath it.
Of course, this initial key is rarely perfect. And that's okay. Now, the real artistry begins: refining the key.
Refining Your Matte and Cleaning Up Edges
Once you have your first pass, you need to switch your viewer to the "Alpha" or "Matte" view. In this mode, everything turns black and white. Your subject should be solid white (meaning opaque), and the background should be solid black (transparent).
See any gray areas or staticky-looking speckles? That’s a weak key. Those gray spots represent semi-transparent pixels that will look muddy and unprofessional in the final video.
To fix this, you’ll dive into settings like "Matte Cleanup," "Clip Black," and "Clip White." These tools let you "crush" the blacks and "clip" the whites, essentially forcing those wishy-washy gray pixels to become either fully transparent or fully opaque. Your goal is a high-contrast matte with clean, defined edges around your subject.
A common mistake is cranking these settings too high. It's tempting, but it can create a harsh, "cookie-cutter" outline that screams fake. Tweak the sliders in small increments until the matte is clean but you're still preserving fine details like individual strands of hair.
Advanced Keying Techniques for Flawless Results
Sometimes, a single key just won't cut it, especially if the lighting on your green screen wasn't perfectly even. In a pinch, you can stack multiple keyers, with each one targeting a slightly different shade of green.
Another pro move is to create a "garbage matte." This is just a quick, rough mask you draw around your subject to instantly chop out things you don't want in the shot, like light stands, mic booms, or the edges of the screen.
Next, you have to tackle color spill. This is that faint green halo you often see on a person’s hair or shoulders, caused by green light bouncing off the screen and onto them. Thankfully, almost every keyer has a "Spill Suppression" feature. A single click often does the trick, automatically neutralizing the green fringe by shifting its color to its opposite (magenta), making it disappear into the new background.
If you're using Premiere Pro, you can find a deep dive into these exact settings in our guide on how to use chroma key in Premiere Pro.
The whole post-production process becomes infinitely easier when you get your camera settings right from the start.

As you can see, locking in the right codec, shutter speed, and ISO during the shoot means you’ll spend far less time battling with matte adjustments and spill suppression in the edit.
Finally, you need to handle color matching. Your subject and the new background were shot in entirely different environments, and they'll look like it until you grade them. Use your color tools to adjust the contrast, saturation, and color temperature of your subject until the lighting looks and feels like it all belongs in the same scene. While keying is a manual skill, certain AI video editing software can help automate some of the more complex color matching tasks.
The humble green screen is a cornerstone of modern media production. As major studios pour money into virtual production, the technology has also become more accessible than ever for creators, with sales of portable kits growing by 20–40% each year, driven by platforms like YouTube and TikTok. It's an industrial powerhouse and an essential tool for creators everywhere.
Troubleshooting Common Green Screen Problems
Even when you think you've planned for everything, getting that perfect background green screen video can sometimes feel like a fight against a dozen tiny issues. From stubborn shadows to that tell-tale green halo, a few common problems can really mess up an otherwise perfect take. The trick is knowing how to spot and fix them, both while you're shooting and later on in the edit.
One of the biggest culprits I see is an unevenly lit screen. This is what gives you a blotchy, inconsistent key that just screams "amateur." If you’re seeing dark patches or bright hot spots on your screen, the best thing to do is fix your lights right then and there. Try adding more diffusion or just move them around until you get a flat, even wash of color across the whole backdrop.
Couldn't fix it on set? All is not lost. You can sometimes rescue the footage in post by stacking a few keying effects, with each one dialed in to a different shade of green on the screen.
Taming Green Spill and Fine Details
Ah, color spill. It's probably the most infamous green screen issue—that faint green fringe that creeps onto your subject's hair, shoulders, or even their clothes. It's caused by light bouncing off the screen and onto your talent. The absolute best way to deal with this is to prevent it from happening in the first place by moving your subject at least six to ten feet away from the screen.
If you've already got the footage and the spill is there, don't panic. Every pro keying software has a "Spill Suppressor" feature. This thing is a lifesaver; it automatically finds and kills the unwanted green tones, saving you a ton of time you'd otherwise spend on manual color correction. For a more detailed breakdown, you can read our guide on fixing common video background issues.
Another huge challenge is getting a clean key around fine details, especially hair. Frizzy, curly, or blonde hair can be a real headache to isolate cleanly.
- Go High-Res: Shooting in 4K gives your software a lot more pixel information to analyze, which makes it much easier to separate those tiny, wispy strands from the green background.
- Use a Backlight: A subtle light hitting your subject from behind (just out of the camera's view) creates a nice, crisp edge. This "rim light" helps define their silhouette and gives the keyer a clear line to follow.
- Refine the Matte: Once you're in the editing suite, play with the matte refinement tools. You can often "choke" (shrink) or soften the edges just a tiny bit to help blend the hair more naturally into its new environment.
Here's a pro tip: don't be afraid to use a "garbage matte." It’s just a rough mask you draw around your subject to get rid of anything you don't need—like light stands, wrinkles in the screen, or the edges of the backdrop—before you even apply the chroma key. It simplifies the whole process.
By combining these on-set adjustments with some smart post-production work, you can rescue even the most difficult shots and pull off a clean, believable composite every time.
Common Green Screen Questions Answered
When you're starting out with green screen, a few questions always seem to pop up. Getting these sorted out early on can save you a world of headaches in post-production. Let's tackle some of the most common ones I hear.
Green Screen vs. Blue Screen: Which One Is Better?
People often wonder if they have to use green. The short answer is no—you can absolutely use blue. The technique is called chroma keying, which just means we're isolating and removing a specific color. For a long time, blue was the go-to in the film industry.
So why is green so popular now? It's mostly because digital camera sensors are typically most sensitive to the green color channel. This sensitivity often gives you a cleaner key with less noise. But there's a simple rule of thumb: if your subject is wearing or holding something green, switch to a blue screen.
How Do I Match My Lighting?
This is maybe the most important question for creating a believable final shot. You can have a perfect key, but if the lighting on your subject doesn't match the new background, the whole illusion falls apart.
The trick is to plan ahead. Look at your background plate before you shoot. Where is the main light source coming from? Is it a harsh, direct sun on the left? Or maybe it's a soft, overcast day with diffused light from above? Your job is to recreate that lighting on your subject. Mimic the direction, the softness, and even the color temperature of the light in your background plate. This is the secret to making it all look seamless.
Can I Do This on a Budget?
Absolutely. You don't need a Hollywood-level studio to pull off a good green screen shot. People get great results with a smooth green fabric (ironed to remove wrinkles!), a wall painted the right color, or even a couple of large green poster boards from a craft store.
The most critical factor isn't how much you spend on the screen itself, but how evenly you can light it. Two or three cheap work lights from a hardware store dedicated just to lighting the screen can be more effective than one expensive studio light.
What's the "Right" Shade of Green?
You'll often hear terms like "chroma key green" or "digi green," and there's a reason for that. There's a specific, vibrant shade that works best.
- The hex code is right around #00ff00—a pure, bright green.
- This color is used because it's very distinct from natural human skin tones and hair color.
- Sticking to this standard shade makes it incredibly easy for your software to identify and remove the background cleanly.
Using a random shade of green paint from the hardware store can work, but you'll make the post-production process much smoother by using a color designed for chroma keying.
Tired of the setup and lighting hassles? With VideoBGRemover, you can skip the green screen entirely. Our AI-powered tool removes your video background in minutes, giving you a perfect cutout with just a few clicks. Create professional videos from anywhere by visiting https://videobgremover.com.
Tagged with
Ready to Remove Your Video Background?
See a free preview before you buy.
No credit card required • Free preview on every video